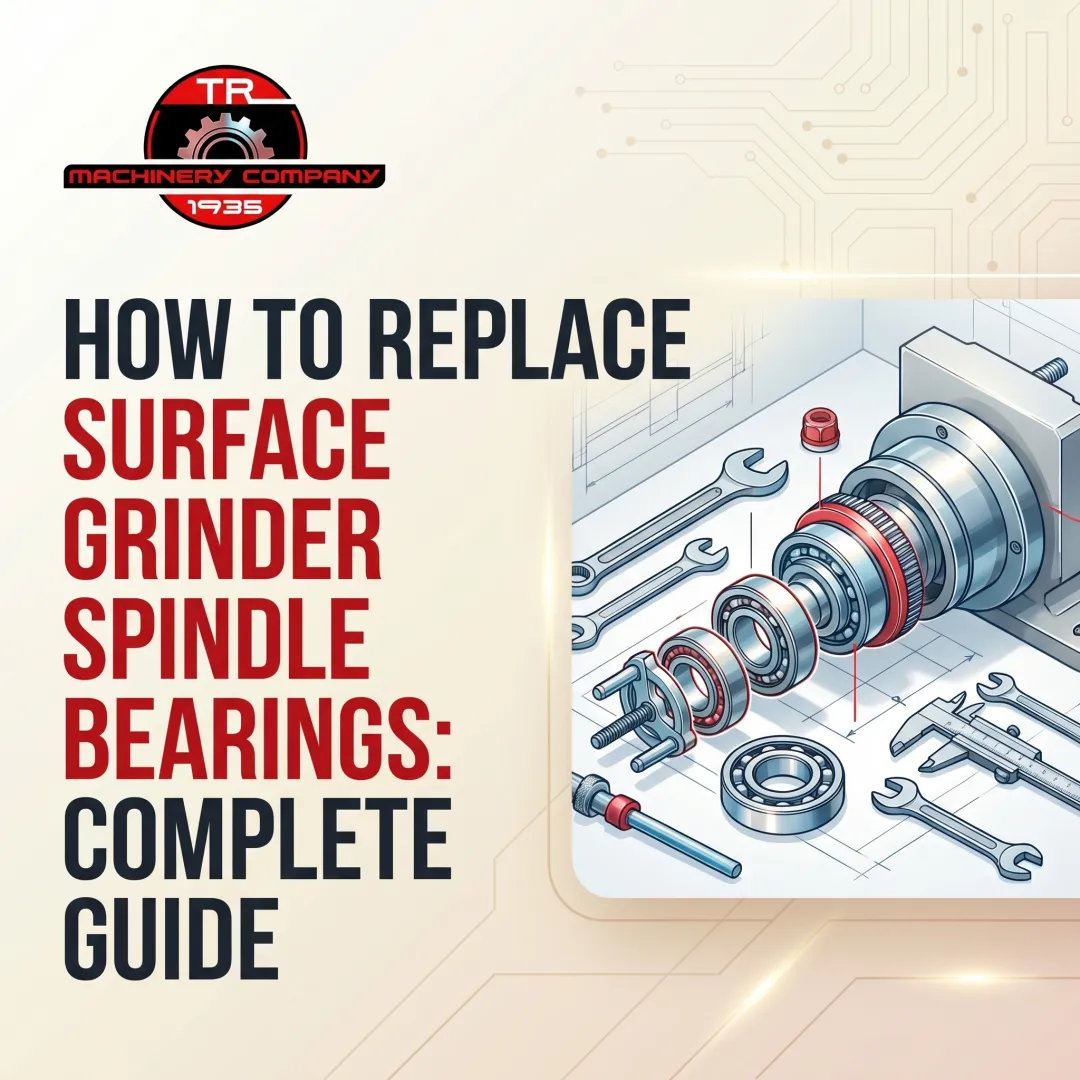
Introduction
On a surface grinder, the magnetic chuck is what keeps everything else honest. Without reliable holding power, no grind is accurate, and no part is safe. A workpiece that slips or shifts mid-cut doesn't just ruin dimensions—it can be ejected from the chuck with enough force to cause serious injury or death.
Magnetic chuck problems are more common than most shops expect. Fluid ingress through compromised terminal boxes, electrical wear from heat cycling, surface degradation from repeated contact, and deferred maintenance all follow predictable patterns. The good news: if you catch these failures early and address them systematically, most are fixable without major downtime or cost.
This guide covers the most common magnetic chuck failures, how to diagnose them, and how to decide when repair stops making economic sense. You'll learn:
- How to run the resistance test that separates a field-fixable problem from a factory-level rebuild
- How to protect the terminal box — the single most vulnerable entry point for coolant damage
- When replacement is the smarter investment over repair
TL;DR
- Magnetic chucks fail from coil damage, surface wear, fluid ingress, and controller faults — all diagnosable
- Many issues like surface pitting and minor electrical faults can be fixed in the field with the right procedure
- Resistance below 100,000 ohms to ground means factory-level repair is required
- Disassembly, structural coil damage, or repair costs near replacement price — replace the chuck
What Is a Magnetic Chuck and How Does It Work?
A magnetic chuck is a workholding device that uses magnetic force to secure ferromagnetic workpieces flat to the grinding table without mechanical clamps. It eliminates the need for vises, bolts, or fixtures, enabling fast setups and unobstructed access to the workpiece surface.
Two Main Types
Permanent Magnetic Chucks:
- No electrical power required to hold
- Lever-activated, using powerful rare earth (NEO) or ceramic magnet materials
- Hold force is constant and does not generate heat
- Cannot be adjusted for holding strength
Electromagnetic Chucks:
- Powered by DC voltage (typically 0-110 VDC variable, or fixed 115/230 VDC)
- Magnetic field is generated by energized coils inside the chuck body
- Controlled via an external rectifier unit that converts AC to DC
- Holding power is adjustable by changing the voltage supplied to the coil
Both types share common failure modes — surface wear, loss of flatness, and mechanical damage. Electromagnetic chucks carry additional electrical vulnerabilities on top of those: coil insulation breakdown, terminal box corrosion, rectifier faults, and wiring failures. Understanding which type you're working with determines where to start your diagnosis.

The Chuck as a Degrading System
A magnetic chuck is not a static component. Over time:
- The top plate wears from repeated workpiece contact
- Coil insulation degrades under heat and coolant exposure
- Terminal connections corrode from fluid ingress
- Surface flatness drifts, creating air gaps that reduce holding force
Each of these failure modes reduces grinding quality and operator safety. A chuck that looks fine externally may have internal electrical faults capable of causing sudden, complete loss of holding power mid-cut — with no visible warning beforehand.
Common Magnetic Chuck Problems (and Why They Happen)
Most chuck failures in grinding operations follow a small set of recognizable patterns. Early identification prevents scrapped parts, machine crashes, and serious safety incidents.
Problem 1: Loss of Holding Power
Symptoms:
- Workpiece slips or shifts under grinding load
- Inconsistent surface finish
- Parts being thrown from the chuck surface
Likely Causes:
- Weakened coil output from low DC supply voltage or partial coil failure
- Degraded insulation from heat cycling, allowing current to leak to ground
- Demagnetization of pole pieces in permanent chucks (irreversible above 176°F)
- Incorrect voltage setting on the controller
Holding power is directly controlled by DC voltage in electromagnetic chucks. A failed or misconfigured rectifier means the coils can't generate sufficient magnetic flux. For permanent chucks, heat damage or exposure to demagnetizing fields requires factory re-magnetization to restore — it can't be fixed on-site.
Problem 2: Uneven or "Hot Spot" Magnetism
Symptoms:
- Chuck holds well in some zones but poorly in others
- Controller blows fuses repeatedly
- Sections of the surface feel warm to the touch
Likely Causes:
- Fluid ingress through a compromised terminal box seal, causing localized coil shorts
- Partial coil failure breaking the uniformity of the magnetic circuit
- Internal wiring damage creating resistance hot spots
Fluid ingress is the most common trigger here. Once coolant bridges the gap between coil and chuck case, current arcs to ground — creating localized heating, uneven magnetic distribution, and eventually a blown controller fuse as the short progresses.
Problem 3: Chuck Surface Wear, Pitting, or Loss of Flatness
Symptoms:
- Visible grooves, rust pitting, or dents on the top plate
- Workpiece rocks or doesn't seat fully flat
- Part dimensions drift after grinding
Likely Causes:
- Mechanical wear from repeated workpiece contact
- Corrosion from coolant exposure without proper surface protection
- Improper regrinding of the top plate (too aggressive, wrong wheel, or dry grinding)
Surface irregularity creates an air gap between the chuck and workpiece. According to Eclipse Magnetics data, holding performance for mild steel drops to approximately 70% at a 0.2 mm air gap, and 50% at a 0.4 mm air gap. Even microscopic surface damage degrades holding force significantly.
Problem 4: Chuck Will Not Engage or Disengage
Symptoms:
- Controller switch does not activate magnetism
- Chuck stays "on" and cannot be demagnetized
- Erratic on/off behavior
Likely Causes:
- Faulty rectifier or controller unit (blown fuses, failed capacitors, or bad relays)
- Damaged wiring between controller and chuck
- Failed brushes or contaminated collector rings on rotary chucks
- Open or shorted coil inside the chuck body
Any of these faults left unaddressed compounds quickly. Scrapped workpieces and unplanned downtime are the immediate costs — but the larger risk is a loose part ejected from the grinder at speed, which can be fatal. Workpiece shift during a cut also drives chatter and vibration that accelerates spindle wear, turning a chuck problem into a much more expensive machine repair.
How to Diagnose and Fix a Magnetic Chuck (Step-by-Step)
Guessing at the fix without confirming the root cause leads to wasted time, unnecessary parts replacement, and repeat failures. Start with a disciplined diagnostic sequence.
Step 1: Perform the Resistance Test First
This is the single most important diagnostic step. It tells you whether the problem is fixable in the field or requires factory-level repair.
Grab an ohmmeter or multimeter set to resistance mode, then run two tests:
Test resistance to ground:
- Disconnect power to the chuck
- Connect one ohmmeter lead to either power lead of the chuck
- Connect the other lead to the chuck body (grounded metal surface)
- Resistance to ground must exceed 100,000 ohms (100kΩ)
- A reading below this threshold confirms internal coil or wiring damage requiring factory repair
Test resistance across power leads:
- Calculate expected resistance using Ohm's Law: Resistance (Ohms) = Volts ÷ Amperage
- Use the nameplate voltage and amperage ratings (e.g., 110V ÷ 5A = 22 ohms)
- Measure actual resistance across the two power leads
- If measured resistance deviates more than 10% from the calculated value, plan for factory-level service
- If resistance is less than 75% of the calculated value, the chuck has shorted turns and must not be operated

Critical Note: Some manufacturers specify higher insulation resistance thresholds—Kanetec, for example, requires 5 MΩ or more measured with a 500 VDC insulation resistance tester. Always consult your chuck's service manual for OEM specifications.
Step 2: Inspect and Secure the Terminal Box
The terminal box is the single most common entry point for fluid damage. It is the least sealed part of the chuck and the origin for all electrical connections.
Inspection checklist:
- Broken or deteriorated gaskets
- Bent or improperly tightened cord grips
- Cracked or missing cover plate
- Evidence of fluid inside the box (discoloration, corrosion, or standing liquid)
- Hoses or coolant lines attached to the terminal box housing (a common but dangerous practice)
If the seal is compromised but coils are still within resistance spec:
- Clean the terminal box thoroughly and dry completely
- Replace the gasket with a new OEM part—reusing old gaskets guarantees future leaks
- Reseal the cover plate and ensure all cord grips are properly tightened
- Monitor resistance readings over the next week to confirm no moisture has entered the coil cavity
If fluid has already entered the chuck cavity:
- Proceed immediately to the resistance test
- If resistance to ground is below 100kΩ, the chuck requires factory repair or replacement
- Do not attempt to operate the chuck—internal arcing can cause fire or complete coil failure
Step 3: Regrind the Top Plate (Surface Issues)
If your resistance tests came back within spec but the top plate shows wear, pitting, or loss of flatness, the surface must be reground to restore a perfectly flat, uninterrupted magnetic contact face.
Regrinding procedure:
- Grind the bottom base plate of the chuck first to ensure it seats flat on the grinder table
- Block the ends of the chuck (do not energize it to hold itself in place)
- Use wet grinding only—never dry grind a magnetic chuck
- Use a general-purpose medium hardness 36-40 grit grinding wheel
- Use non-nitrate or inhibited-nitrate coolant
- Remove no more than 0.0001" per pass to avoid overheating the chuck body
- Typically, 1/3 of the top plate thickness is the maximum total removal allowed over the chuck's life
After regrinding:
- Demagnetize the chuck completely
- Clean the surface thoroughly to remove grinding swarf and coolant residue
- Inspect for flatness using a precision straight edge and feeler gauges
- Test holding force with a sample workpiece before returning to production
Important: If you don't have access to appropriate surface grinding equipment and precision measurement tools, send the chuck out for professional resurfacing. Improper regrinding creates more problems than it solves.
Step 4: Address Controller and Electrical Faults
If resistance tests are within spec but the chuck still won't engage or disengage, shift focus to the external rectifier/controller.
Controller diagnostics:
- Check for blown fuses—replace with the correct amperage rating only
- Verify correct DC voltage is reaching the chuck input leads (use a multimeter set to DC volts)
- Inspect wiring for loose connections, cracked insulation, or visible damage
- Check that the controller is receiving proper AC input voltage
For rotary chucks specifically:
- Access the brush and collector ring assembly (consult your chuck's service manual for location and procedure)
- Check that each spring-loaded brush moves freely and contacts the ring firmly
- Inspect collector rings for pitting, discoloration, or carbon buildup
- Clean rings with fine emery cloth if dirty; replace if severely pitted
- Replace worn brush kits per manufacturer specifications
Neglected collector rings cause arcing and carbon buildup that can blow a chuck coil. According to industry repair cost data, that failure can run $8,000–$50,000 in emergency repairs and unscheduled downtime.
Step 5: Test and Validate After Any Repair
After completing the repair, reconnect power and test the chuck under normal operating load:
- Verify uniform holding force across the full surface using a test workpiece
- Check for any localized warm spots by carefully touching the chuck surface after 5-10 minutes of operation
- Confirm the controller engages and demagnetizes cleanly without hesitation
- Monitor for recurrence over the next week before returning to full production use
When to Fix vs. Replace Your Magnetic Chuck
This decision is a cost-risk-performance calculation. The goal is not the cheapest short-term fix, but avoiding a catastrophic failure mid-production that scraps parts, damages the machine, or injures an operator.
Fix It (Field Repair) If:
- Resistance test is within spec (>100kΩ to ground, within 10% of calculated coil resistance)
- The problem is isolated to the terminal box seal, surface wear, or an external controller/rectifier unit
- These are addressable without disassembling the chuck body itself
Typical field-repairable issues:
- Terminal box gasket replacement and resealing
- Top plate resurfacing
- Controller/rectifier replacement
- Brush and collector ring service on rotary chucks
- Wiring repairs external to the chuck body
Fix It (Factory Repair) If:
- Resistance readings indicate a grounded or open coil, but the chuck body is structurally sound
- A specialized repair facility can rewind coils, replace internal wiring, and restore waterproofing
- Factory repairs typically cost less than a new chuck and include a comparable warranty
Replace It If:

- The chuck has already been disassembled and rebuilt once — reopening it disturbs the electromagnetic field balance and removes original waterproofing; restoring it to OEM spec is rarely achievable
- Disassembly also voids any remaining manufacturer warranty, removing a key reason to repair rather than replace
- The body is physically cracked, deformed, or shows signs of structural damage
- Repair cost approaches the cost of a remanufactured or new replacement unit
- The chuck is incompatible with current workpiece geometries, material types, or production tolerances
Pole Pitch and Modern Workpiece Requirements
Older chuck designs may lack the pole pitch density needed for modern precision work. The best holding condition is when workpiece thickness is 2 to 4 times the pole pitch. Here's how the two common configurations compare:
| Chuck Type | Steel Spacing | Brass Spacing | Workpiece Thickness |
|---|---|---|---|
| Fine pole | 1.5mm | 0.5mm | 0.7mm – 3mm |
| Standard pole | 4mm | 2mm | Above 3mm |
If your current workpieces are thinner or smaller than your chuck was designed for, replacement with a fine-pole model may be the only way to achieve safe, reliable holding.
If you're weighing repair against replacement, T.R. Wigglesworth Machinery Co. has been working with surface grinder equipment since 1935 and can help evaluate options for major brands including ACER, KENT, Clausing, and Supertec — with practical guidance on whether a specific chuck model is worth rebuilding or sourcing new.
Common Mistakes to Avoid and Preventive Maintenance
Treating Symptoms Instead of Root Cause
Replacing fuses or resetting the controller without running the resistance test first leads to repeat failures and masks a potentially dangerous internal short. Always confirm coil integrity before assuming the controller is at fault.
If the fuse blows again immediately after replacement, the problem is in the chuck body or wiring—not the fuse.
Skipping the Terminal Box
The terminal box is the most common entry point for coolant damage. Establish a routine inspection of the terminal box seal, cord grip, and cover at every scheduled maintenance interval.
Never attach fluid hoses to the terminal box housing. This is a common but dangerous practice that accelerates seal failure and coolant ingress.
Ignoring Surface Condition
The top plate should be inspected for flatness and pitting on a regular schedule: quarterly for high-volume operations, or after every 500 hours of grinding time. An uneven surface affects both dimensional accuracy and holding power.
If the flat contact area drops below 90% of the original surface, take the chuck out of service for regrinding. See the Walker CE Manual for manufacturer tolerances.
Establish a Maintenance Log
Avoiding the three mistakes above is easier when you have data to work from. Document chuck resistance readings, surface condition checks, and any corrective actions over time. A trend of declining resistance values signals a deteriorating coil before complete failure, giving you time to plan maintenance rather than react to downtime.
Recommended maintenance schedule:
- Daily: Check power cords, switches, and enclosure for physical damage; inspect holding surface for nicks or burrs
- Weekly: Check top plate flatness and wear; verify uniform holding force across the full surface
- Annually: Re-test the chuck for breakaway force; perform full resistance test and terminal box inspection

Conclusion
Most magnetic chuck problems—from surface wear and terminal box damage to controller faults—are fixable if caught early and addressed systematically. Start with the resistance test rather than assumption. If resistance to ground exceeds 100,000 ohms and coil resistance is within 10% of the nameplate value, the problem is likely external and field-repairable.
The fix-vs.-replace decision hinges on whether the chuck body's electrical integrity is intact. Field and factory repairs are viable for isolated failures, but a fully compromised chuck costs more in lost production and safety risk than a quality replacement.
Deferred maintenance is the primary driver of avoidable chuck failures. Each of these checks takes minutes per month:
- Resistance testing — confirms coil and insulation health before a small fault becomes a coil failure
- Terminal box inspection — catches moisture intrusion and loose connections early
- Surface condition checks — identifies wear or grinding residue that degrades holding force
Together, they prevent hours of unplanned downtime, scrapped parts, and the hazard of a loose workpiece ejected at grinding speed. A few minutes of routine attention keeps the chuck — and the grinder — running reliably.
Frequently Asked Questions
Can a surface grinder magnetic chuck be repaired?
Yes, many surface grinder magnetic chucks can be repaired. Top plate resurfacing, terminal box resealing, and controller replacement are all field-repairable. Internal coil damage typically requires factory-level service, and in some cases replacement is more cost-effective than repair.
How do I know if my magnetic chuck has a bad coil?
Use an ohmmeter to test resistance to ground (must exceed 100,000 ohms) and resistance across the power leads (must be within 10% of the nameplate-calculated value). Readings outside these ranges confirm coil or wiring damage.
What causes a magnetic chuck to lose holding power?
The main causes are partial coil failure, low or incorrect DC voltage supply, fluid contamination inside the chuck body, or a worn/pitted top plate creating an air gap between the chuck surface and the workpiece.
How often should a magnetic chuck be serviced?
Perform resistance testing and terminal box inspection quarterly or after every 500 hours of operation. Check surface condition weekly for high-volume operations. Deferred maintenance is the primary driver of avoidable chuck failures.
What is the resistance test for a magnetic chuck and how do I perform it?
Disconnect the chuck from its controller, then connect an ohmmeter between each power lead and the chuck body (ground). Next, measure resistance across the two power leads. Compare both readings against your nameplate ratings using Ohm's Law (R = V ÷ I) — thresholds are covered in the coil diagnosis question above.
When should I replace a magnetic chuck instead of repairing it?
Replacement makes more sense than repair in three situations: the chuck has been fully disassembled (compromising its waterproofing and insulation), repair costs approach the price of a remanufactured unit, or the existing design can no longer meet your current precision requirements.